> ## Documentation Index
> Fetch the complete documentation index at: https://docs.release0.com/llms.txt
> Use this file to discover all available pages before exploring further.
# How to integrate your Agent with Chatwoot
> Enable live chat functionality in your chatbot using Chatwoot integration.
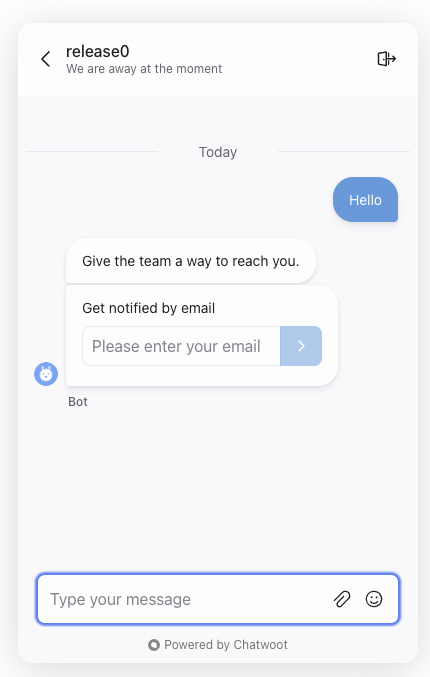
The Chatwoot integration element allows you to open a Chatwoot widget, enabling users to directly communicate with a human. This feature adds a **Live Chat** layer to your **Agent Dialog** on *release0.com*.
## Requirements
To use this integration, ensure the following prerequisites are met:
**Chatwoot Account**: Create an account on [Chatwoot](https://www.chatwoot.com).
**Website Inbox**: Set up a "Website" inbox in your Chatwoot account.
### Steps to Create a Website Inbox
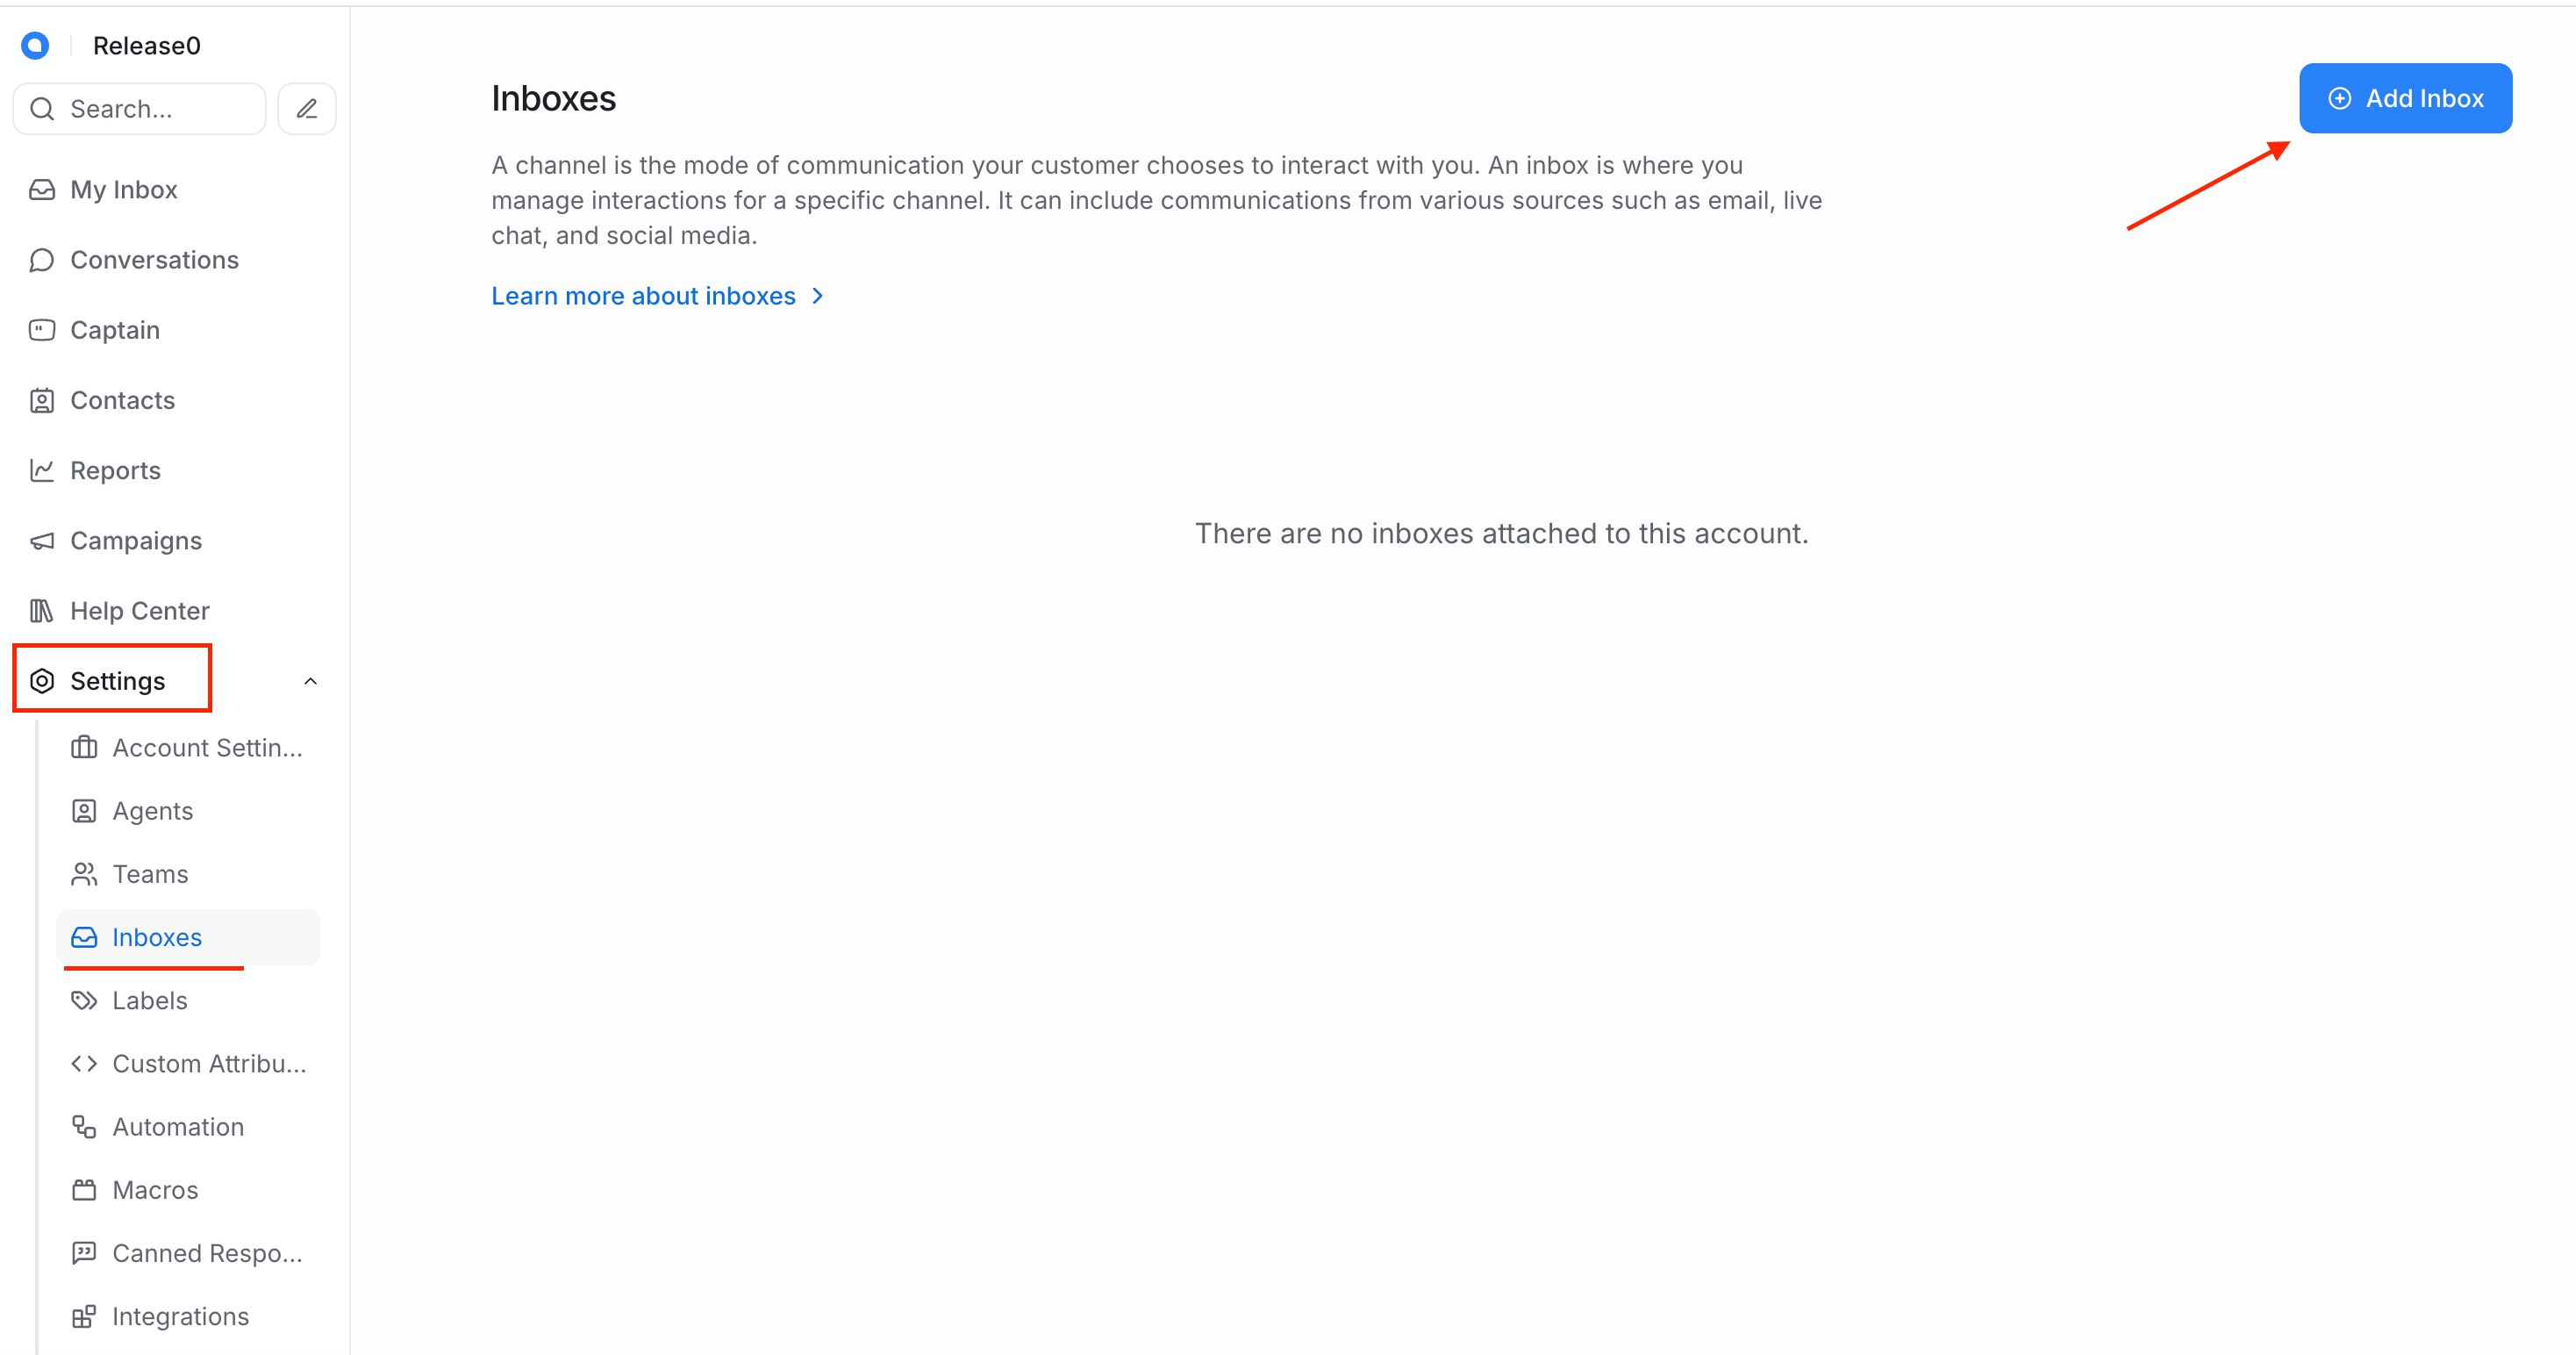
1. Log in to your Chatwoot account.
2. Navigate to the **Settings**.
3. Select **Inboxes** and click on **Add Inbox**.
 4. Then in the **Choose channel** section, select **Website**.
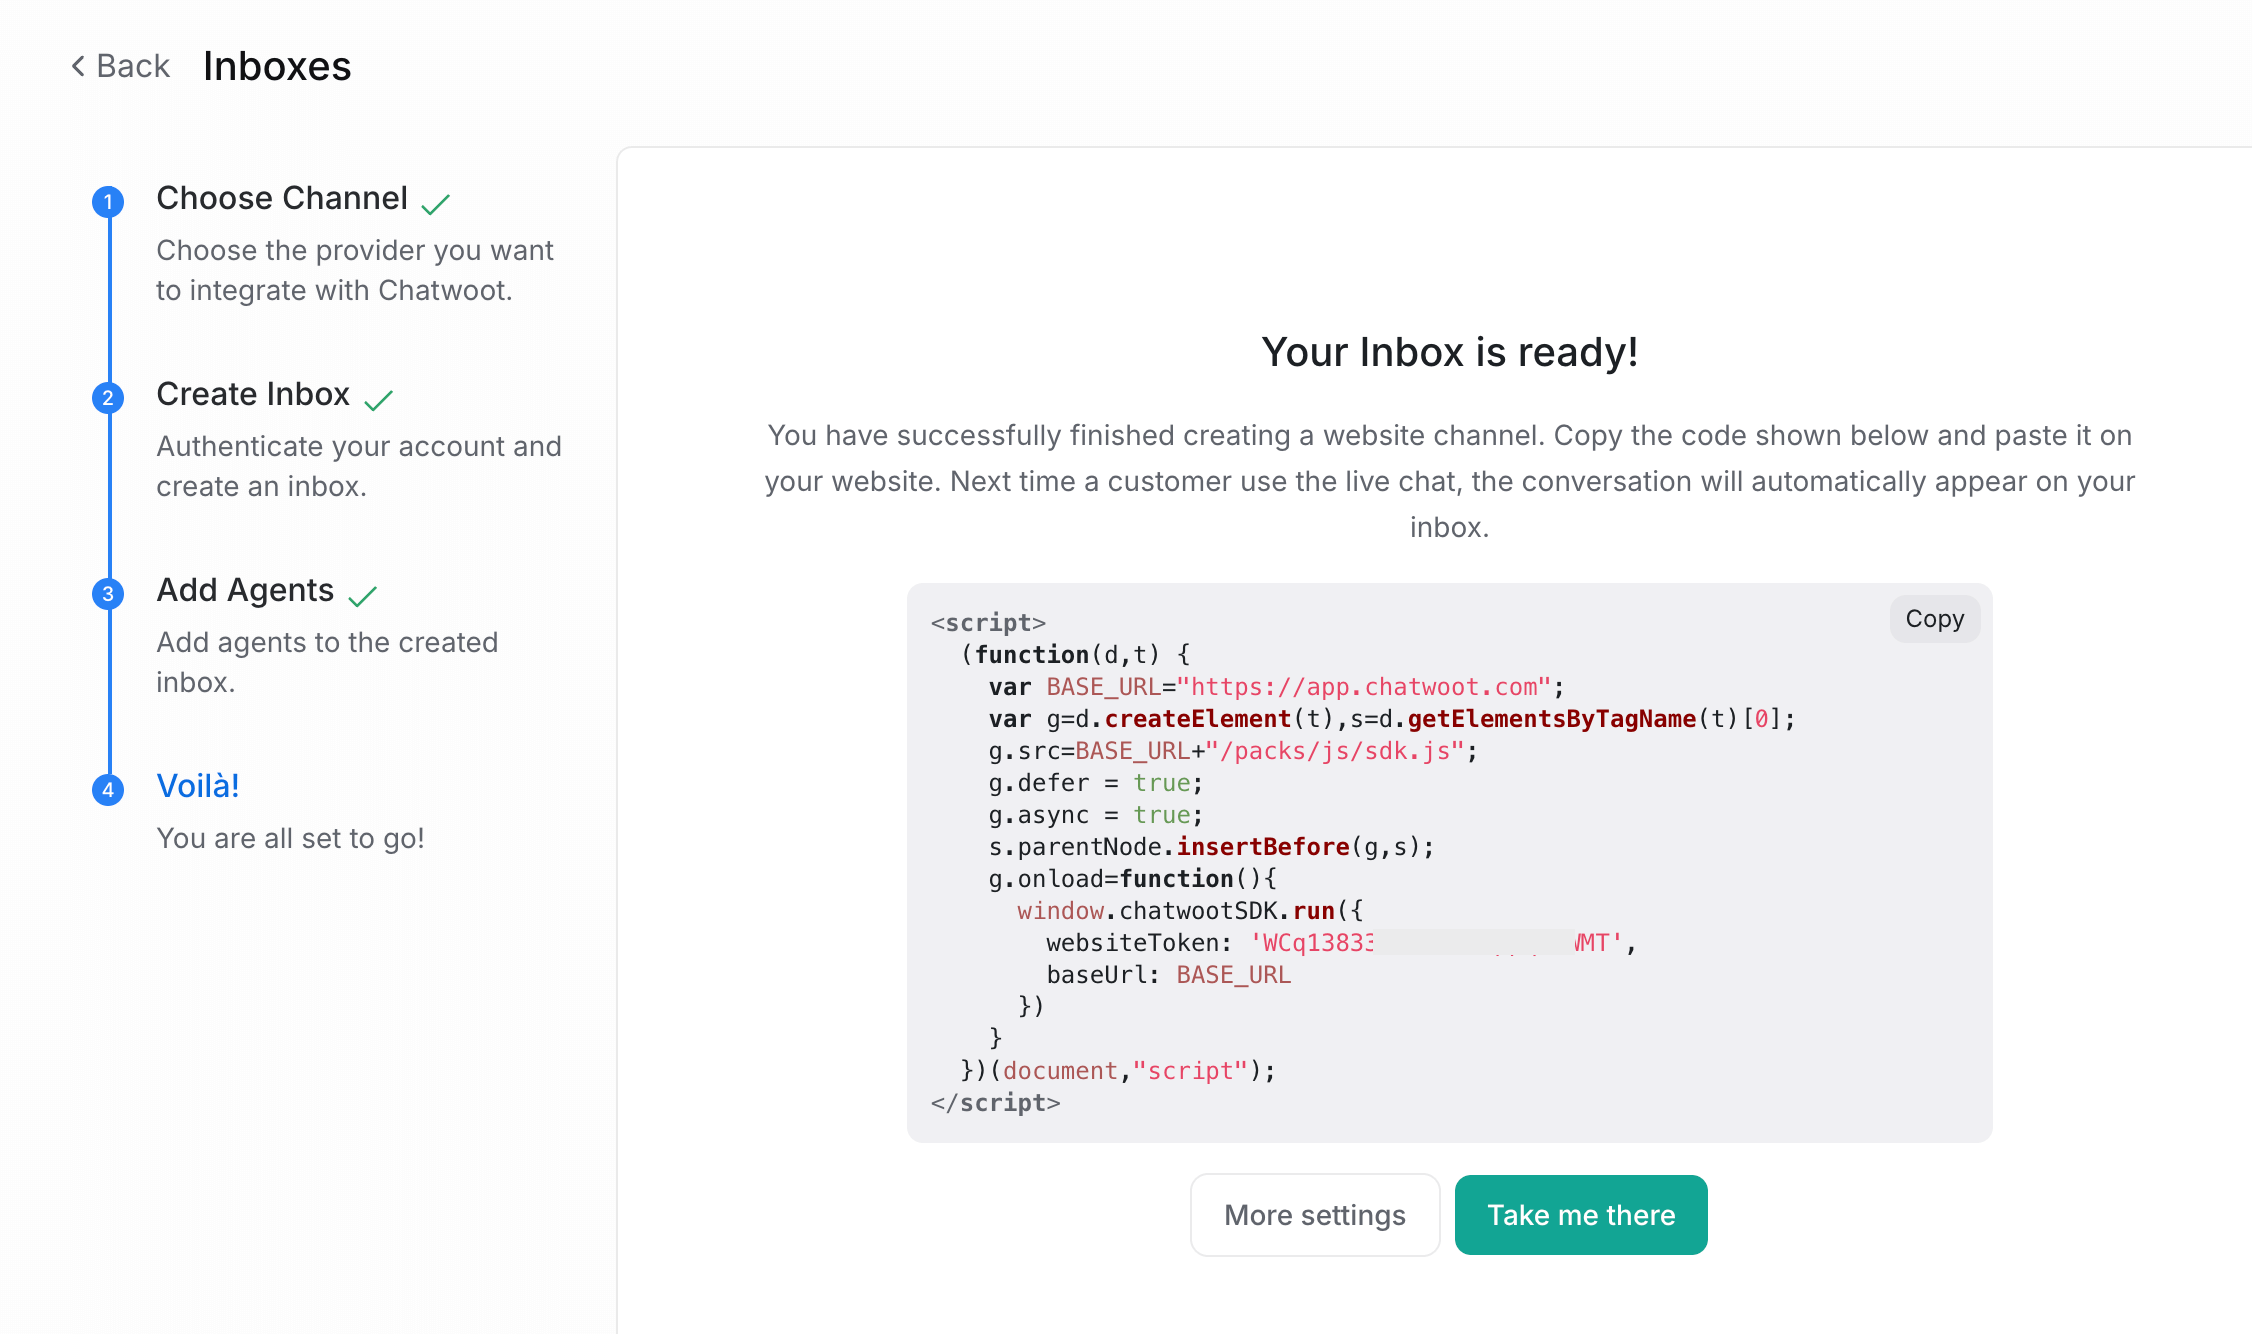
 5. Fill in the required details, such as the inbox name and website URL.
6. Click on **Create Inbox** to finalize the setup.
7. Then copy your **Website Token** from the **Inbox Settings**. This will be used to connect your **Chatwoot element** in your agent flow with your Chatwoot.
5. Fill in the required details, such as the inbox name and website URL.
6. Click on **Create Inbox** to finalize the setup.
7. Then copy your **Website Token** from the **Inbox Settings**. This will be used to connect your **Chatwoot element** in your agent flow with your Chatwoot.
 ## Setup Instructions
### 1. Insert a Chatwoot element
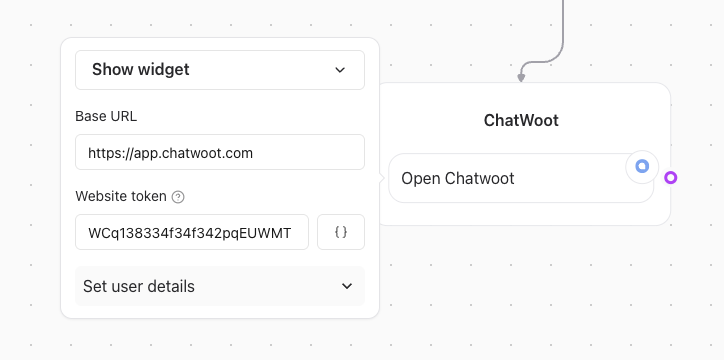
Place the **Chatwoot element** in your **Agent Dialog** wherever you want the widget to be triggered.
## Setup Instructions
### 1. Insert a Chatwoot element
Place the **Chatwoot element** in your **Agent Dialog** wherever you want the widget to be triggered.
 ### 2. Obtain Your Website Token
To locate your website token:
1. Go to your Chatwoot dashboard.
2. Navigate to **Inbox Settings** of your created Website Inbox.
3. Copy the **Website Token**.
### 3. Prefill User Information
You can use collected variables to prefill user information in Chatwoot by setting values in the **Set User Details** section.
* **Example**: If you set the `Email` input to `john@gmail.com`, Chatwoot will associate the email with the current user.
## Custom Attributes
Chatwoot supports custom attributes, which allow you to enhance user interactions. These attributes will be automatically filled by your **Agent Dialog**.
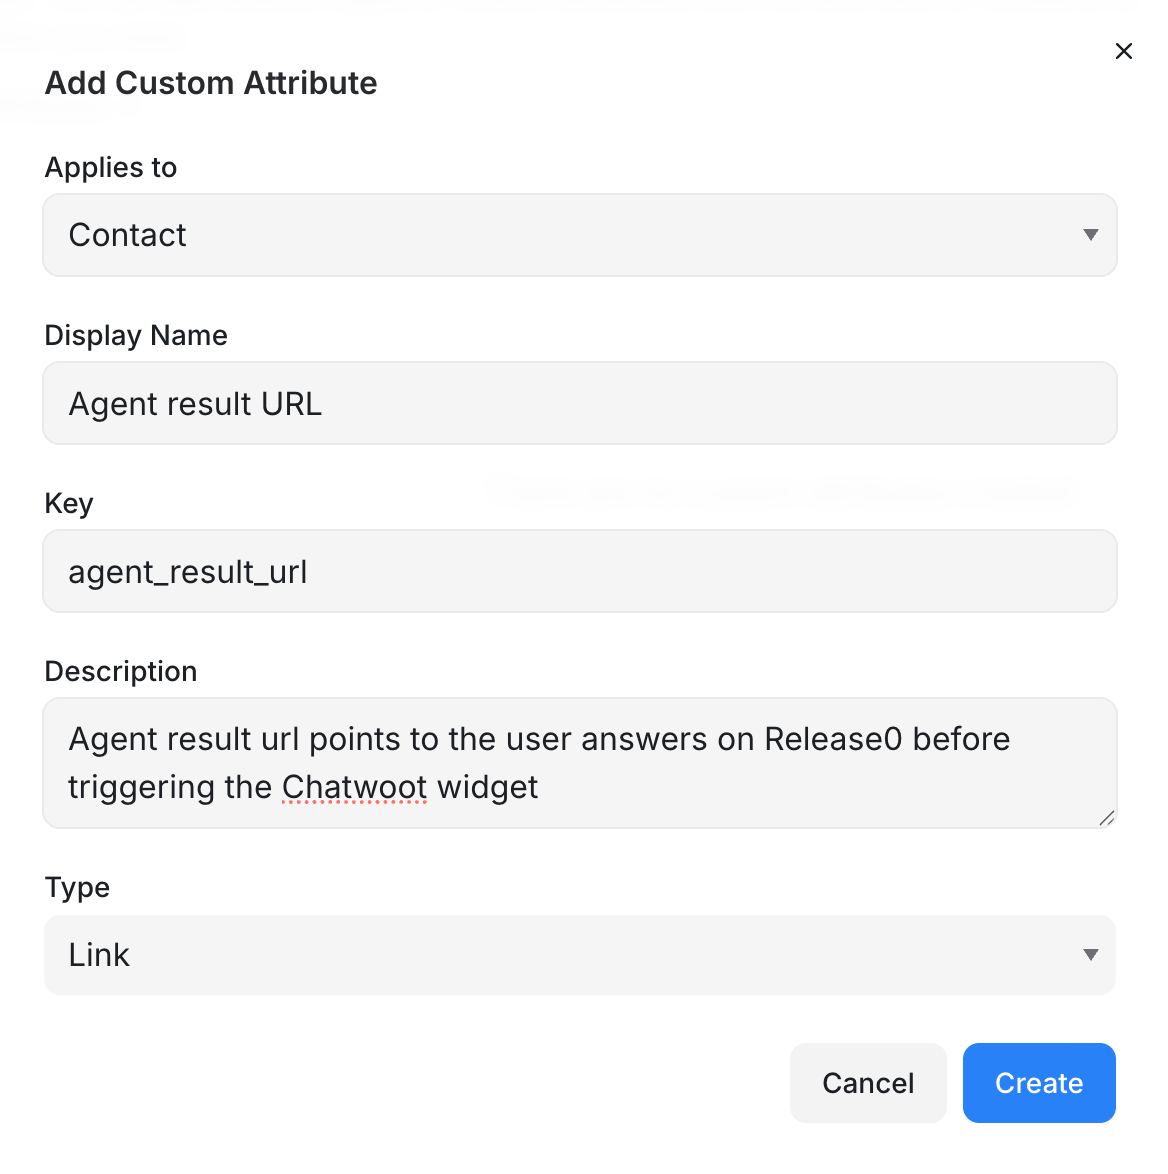
### Example: Result URL
You can link the current **Result URL** to the Chatwoot conversation by adding the following custom attribute:
* Applies to: Contact
* Display Name: Agent Result URL
* Key: Agent\_result\_url
* Description: Release0 result URL that points the user on Release0, before triggering the Chatwoot widget
* Type: Link
### 2. Obtain Your Website Token
To locate your website token:
1. Go to your Chatwoot dashboard.
2. Navigate to **Inbox Settings** of your created Website Inbox.
3. Copy the **Website Token**.
### 3. Prefill User Information
You can use collected variables to prefill user information in Chatwoot by setting values in the **Set User Details** section.
* **Example**: If you set the `Email` input to `john@gmail.com`, Chatwoot will associate the email with the current user.
## Custom Attributes
Chatwoot supports custom attributes, which allow you to enhance user interactions. These attributes will be automatically filled by your **Agent Dialog**.
### Example: Result URL
You can link the current **Result URL** to the Chatwoot conversation by adding the following custom attribute:
* Applies to: Contact
* Display Name: Agent Result URL
* Key: Agent\_result\_url
* Description: Release0 result URL that points the user on Release0, before triggering the Chatwoot widget
* Type: Link
 ## Setting User Behavior
When prefilling user information, you can specify how the user ID is handled:
1. **Default Behavior**: If the `ID` input is left empty, Chatwoot will use either:
* The user's `Email`.
* The `Result ID` from your **Agent Dialog**.
2. **Avoid Duplicate Contacts**: Setting the `Email` as the `ID` ensures contacts are properly merged and prevents duplicates in Chatwoot.
### Validation and Testing
Before deploying the integration, ensure the following:
* The **Chatwoot element** is correctly configured in your **Agent Dialog**.
* The **Website Token** is accurate and functional.
* Custom attributes, such as the `Result URL`, are correctly passed to Chatwoot.
* Prefilled user information appears correctly in the Chatwoot conversation.
> **Note**: If issues persist, refer to the [Chatwoot Documentation](https://www.chatwoot.com/docs) or contact their support team.
## Setting User Behavior
When prefilling user information, you can specify how the user ID is handled:
1. **Default Behavior**: If the `ID` input is left empty, Chatwoot will use either:
* The user's `Email`.
* The `Result ID` from your **Agent Dialog**.
2. **Avoid Duplicate Contacts**: Setting the `Email` as the `ID` ensures contacts are properly merged and prevents duplicates in Chatwoot.
### Validation and Testing
Before deploying the integration, ensure the following:
* The **Chatwoot element** is correctly configured in your **Agent Dialog**.
* The **Website Token** is accurate and functional.
* Custom attributes, such as the `Result URL`, are correctly passed to Chatwoot.
* Prefilled user information appears correctly in the Chatwoot conversation.
> **Note**: If issues persist, refer to the [Chatwoot Documentation](https://www.chatwoot.com/docs) or contact their support team.