> ## Documentation Index
> Fetch the complete documentation index at: https://docs.release0.com/llms.txt
> Use this file to discover all available pages before exploring further.
# Customizing Release0 Agent appearance
> Customize the appearance of your Release0 agent, including templates, chat bubbles, and CSS. This guide provides an overview of the Theme section, including how to change the agent's look and feel, customize chat bubbles, and apply custom CSS styles.
The **Theme** section allows you to customize the appearance of your Agent.
## Template
The **Template** section provides a variety of pre-designed themes to choose from. You can select a template that best fits your needs and customize it further.
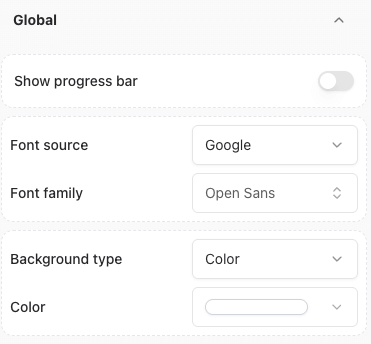
## Global
This section enables you to:
* Enable or disable the Agent branding.
* Change the font used by your Agent.
* Customize the background of your Agent.
* Show the Agent's flow progress bar.
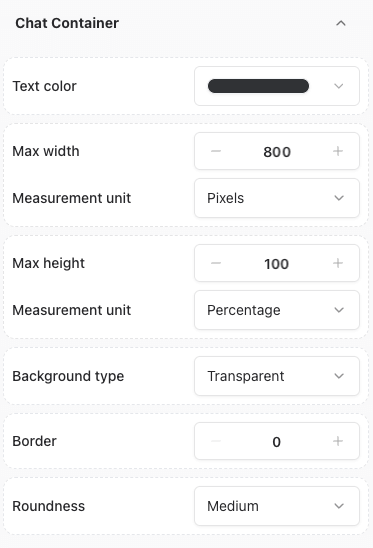
 ## Chat container
This section allows you to personalize the chat window's appearance. You can adjust the following elements:
* Text color
* Max width
* Max height
* Background type
* Border
* Roundness
## Chat container
This section allows you to personalize the chat window's appearance. You can adjust the following elements:
* Text color
* Max width
* Max height
* Background type
* Border
* Roundness
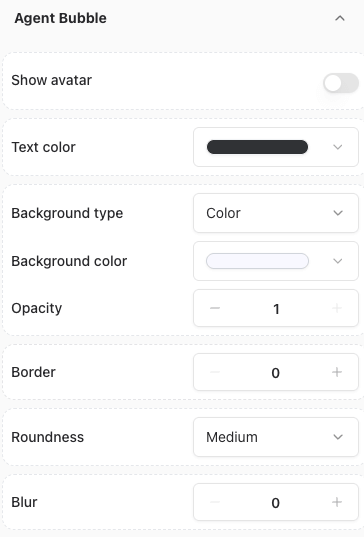
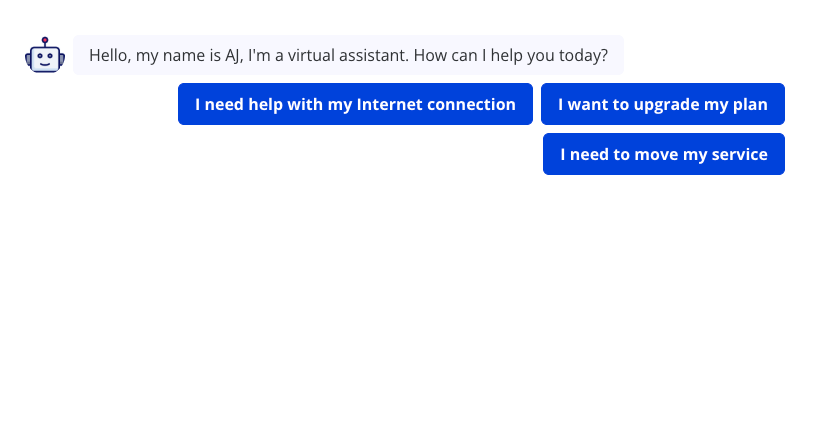
 ## Agent Bubble
This section allows you to customize the appearance of the Agent's chat bubble. You can adjust the following elements:
* Show or hide Agent's avatar
* Avatar image
* Text color
* Background color
* Background type
* Border
* Roundness
* Opacity
## Agent Bubble
This section allows you to customize the appearance of the Agent's chat bubble. You can adjust the following elements:
* Show or hide Agent's avatar
* Avatar image
* Text color
* Background color
* Background type
* Border
* Roundness
* Opacity
 To change the avatar image:
1. Click on the toggle to show the avatar.
2. Click on the agent avatar within the **Chat** section.
3. Upload or select a new image.
To change the avatar image:
1. Click on the toggle to show the avatar.
2. Click on the agent avatar within the **Chat** section.
3. Upload or select a new image.
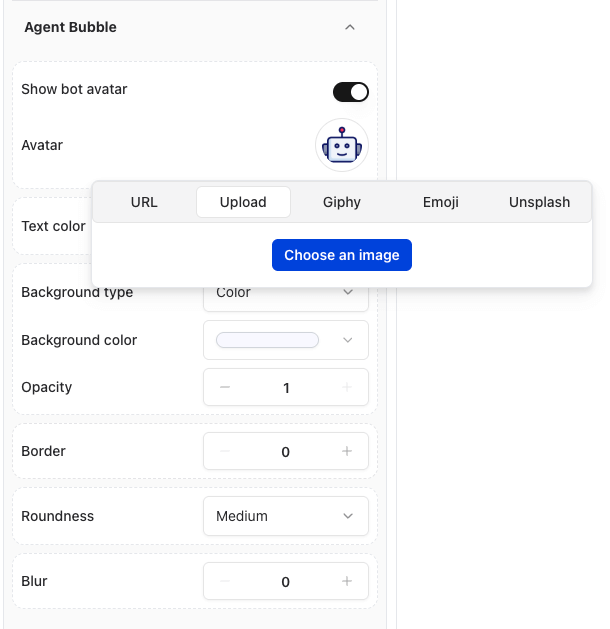 Once changed, you can preview the changes in the preview pane and see your chat agent in action.
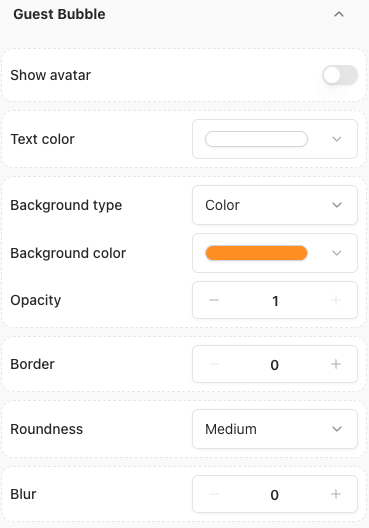
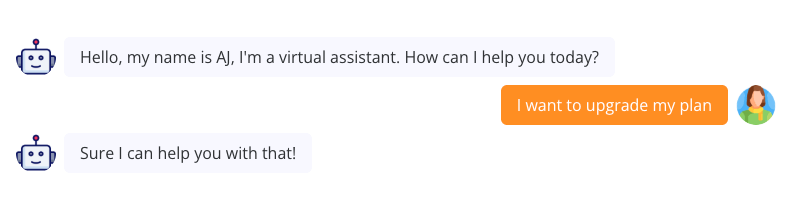
 ## Guest Bubble
This section allows you to customize the appearance of the user's chat bubble. You can adjust the following elements:
* Show or hide user's avatar
* Avatar image
* Text color
* Background color
* Background type
* Border
* Roundness
* Opacity
## Guest Bubble
This section allows you to customize the appearance of the user's chat bubble. You can adjust the following elements:
* Show or hide user's avatar
* Avatar image
* Text color
* Background color
* Background type
* Border
* Roundness
* Opacity
 To change the avatar image:
1. Click on the user's avatar within the **Chat** section.
2. Upload or select a new image.
To change the avatar image:
1. Click on the user's avatar within the **Chat** section.
2. Upload or select a new image.
 Once changed, you can preview the changes in the preview pane and see your chat agent in action.
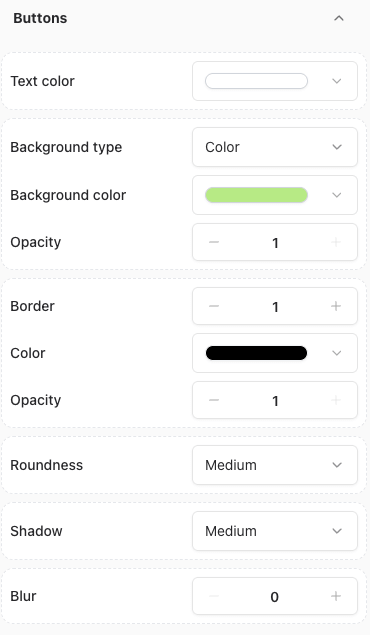
 ## Buttons
This section allows you to customize the appearance of the buttons. You can adjust the following elements:
* Text color
* Background color
* Background type
* Border
* Roundness
* Opacity
* Shadow
* builder
## Buttons
This section allows you to customize the appearance of the buttons. You can adjust the following elements:
* Text color
* Background color
* Background type
* Border
* Roundness
* Opacity
* Shadow
* builder
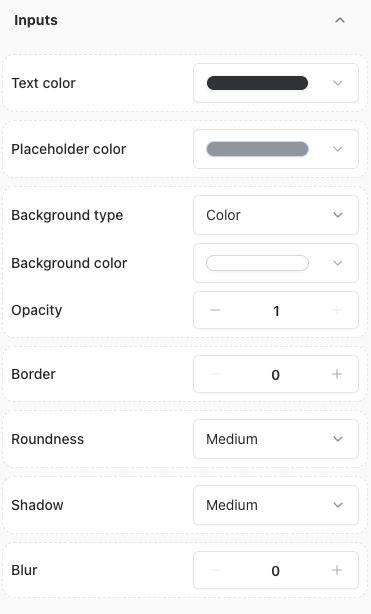
 ## Inputs
This section allows you to customize the appearance of the inputs. You can adjust the following elements:
* Text color
* Placeholder color
* Background color
* Background type
* Opacity
* Border
* Roundness
* Shadow
* builder
## Inputs
This section allows you to customize the appearance of the inputs. You can adjust the following elements:
* Text color
* Placeholder color
* Background color
* Background type
* Opacity
* Border
* Roundness
* Shadow
* builder
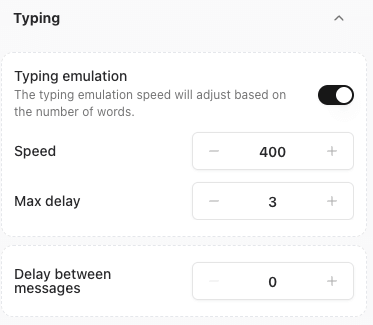
 ## Typing
This section allows you to customize the typing behaviour of your agent. You can adjust the following elements:
* Typing emulation:
* Enable or disable typing emulation.
* Adjust the typing speed (in milliseconds).
* Adjust the maximum delay between messages (in seconds)
* Adjust the delay before the first message is sent (in seconds).
## Typing
This section allows you to customize the typing behaviour of your agent. You can adjust the following elements:
* Typing emulation:
* Enable or disable typing emulation.
* Adjust the typing speed (in milliseconds).
* Adjust the maximum delay between messages (in seconds)
* Adjust the delay before the first message is sent (in seconds).
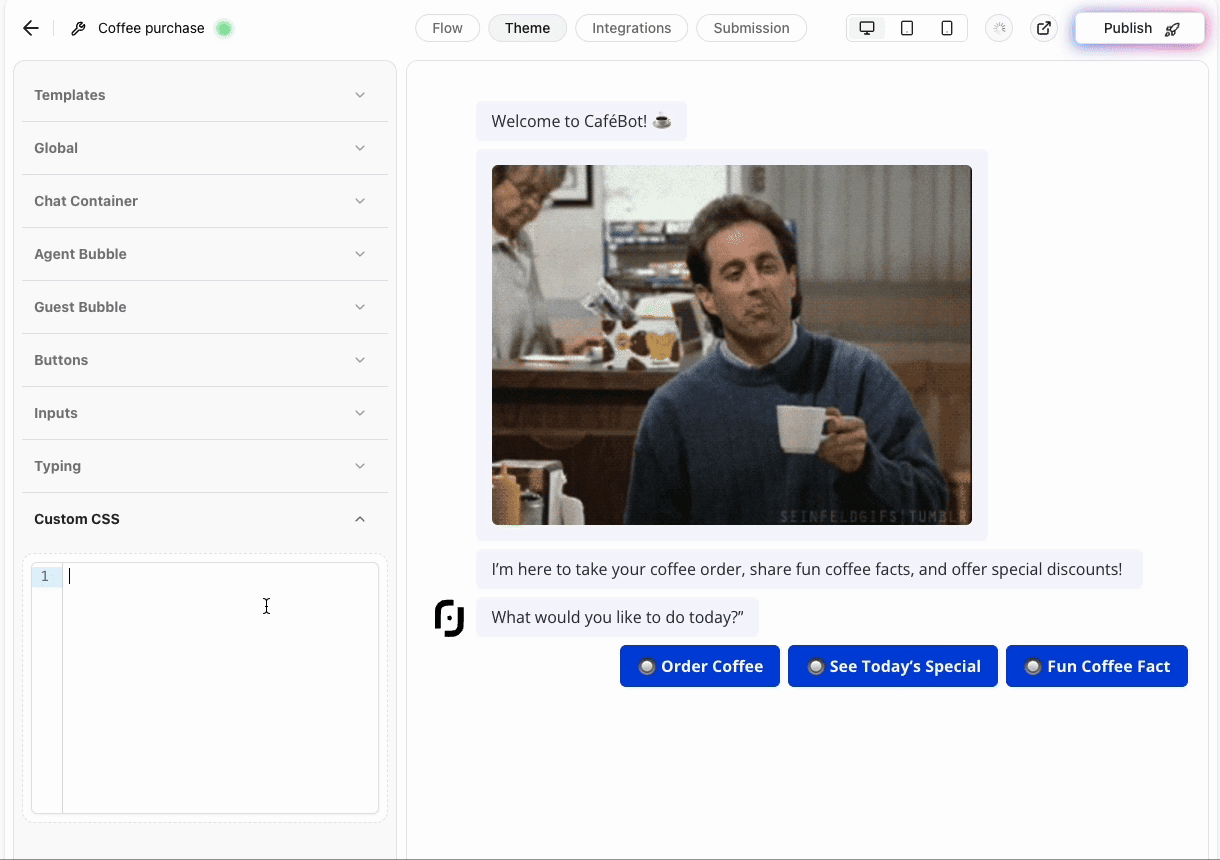
 ## Custom CSS
For advanced customization, you can add your own CSS styles.
## Custom CSS
For advanced customization, you can add your own CSS styles.
 ### Inspecting Elements for Custom CSS
1. Navigate to the **Theme** page.
2. Right-click on the agent or the specific element you want to modify.
3. Select **Inspect** to view and target the element's CSS.
### Example: Rounded Buttons with Gradient Colors
To create buttons with rounded corners and a gradient color, add the following CSS:
```css theme={null}
.agent-button {
border-radius: 40px;
background-image: linear-gradient(to right, #e052a0, #f15c41);
border: none;
}
```
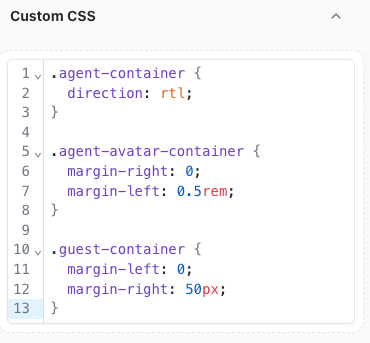
### Example: Configuring RTL chat
You can configure the chat to be displayed in RTL (Right-to-Left) format by adding the following CSS:
```css theme={null}
.agent-container {
direction: rtl;
}
.agent-avatar-container {
margin-right: 0;
margin-left: 0.5rem;
}
.guest-container {
margin-left: 0;
margin-right: 50px;
}
```
### Inspecting Elements for Custom CSS
1. Navigate to the **Theme** page.
2. Right-click on the agent or the specific element you want to modify.
3. Select **Inspect** to view and target the element's CSS.
### Example: Rounded Buttons with Gradient Colors
To create buttons with rounded corners and a gradient color, add the following CSS:
```css theme={null}
.agent-button {
border-radius: 40px;
background-image: linear-gradient(to right, #e052a0, #f15c41);
border: none;
}
```
### Example: Configuring RTL chat
You can configure the chat to be displayed in RTL (Right-to-Left) format by adding the following CSS:
```css theme={null}
.agent-container {
direction: rtl;
}
.agent-avatar-container {
margin-right: 0;
margin-left: 0.5rem;
}
.guest-container {
margin-left: 0;
margin-right: 50px;
}
```
 ### Example: Customize a Single Button’s Color
You can customize the color of an individual button by targeting its `data-itemid` attribute. For instance:
```css theme={null}
[data-itemid='cl3iunm4p000f2e6gfr8cznnn'] {
background-color: gray;
border-color: gray;
}
```
#### Finding the Button's `data-itemid`
1. Right-click on the button you want to customize.
2. Select **Inspect** to view the `data-itemid` attribute in the HTML.
> **Note**: Always test your customizations in a staging environment before applying them to your live Agent.
***
### Validation and Testing
Before applying your customizations:
* Ensure that the custom CSS is properly formatted.
* Test changes across different devices and browsers for consistency.
* Verify that all visual components work as intended.
### Example: Customize a Single Button’s Color
You can customize the color of an individual button by targeting its `data-itemid` attribute. For instance:
```css theme={null}
[data-itemid='cl3iunm4p000f2e6gfr8cznnn'] {
background-color: gray;
border-color: gray;
}
```
#### Finding the Button's `data-itemid`
1. Right-click on the button you want to customize.
2. Select **Inspect** to view the `data-itemid` attribute in the HTML.
> **Note**: Always test your customizations in a staging environment before applying them to your live Agent.
***
### Validation and Testing
Before applying your customizations:
* Ensure that the custom CSS is properly formatted.
* Test changes across different devices and browsers for consistency.
* Verify that all visual components work as intended.