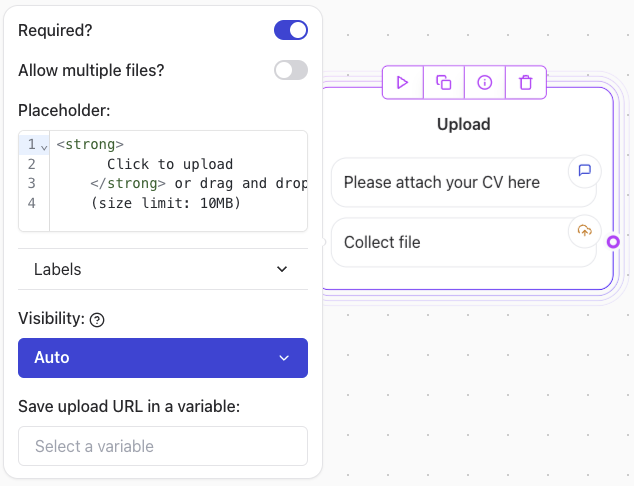
Configuration Steps
1. Allow Multiple Files
- Enable the Allow multiple files? option if you want users to upload more than one file.
2. Customize the Button Label
- Define the text for the upload button in the Button label field.
- Examples:
- “Upload”
- “Submit Files”
3. Save Uploaded URLs
- Use the Save upload URLs in a variable field to store the uploaded file URLs.
- This ensures the file links are available for later use in your workflow.
File Size Limit
- Each uploaded file has a fixed size limit of 10MB.
- For larger files:
- Instruct users to upload their files to a cloud storage service (e.g., Google Drive, Dropbox).
- Use a Text Input Block to collect the shared links.
Other ways to upload files
Alternatively, you can allow your agent to collect images or documents using the Text User Input Block. To do this, enable the Allow attachments toggle within the block settings.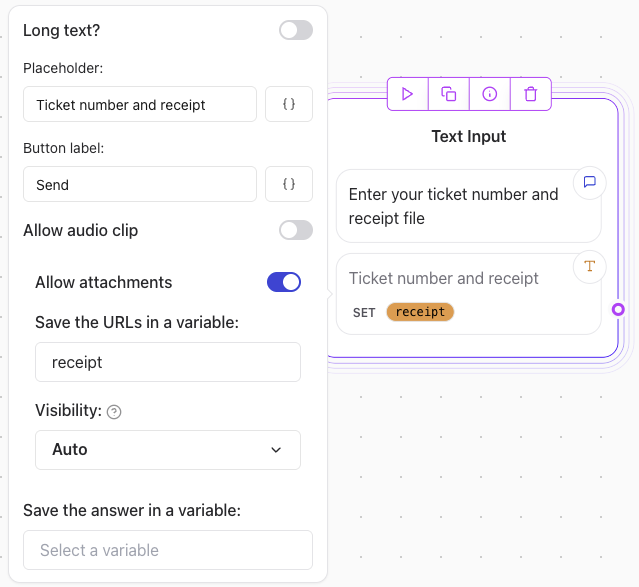

Note: For this method to work make sure you add a variable in the Save the URLs in a variable option.